Cathedral hands and field watches
With the impending completion of the Field Standard, I thought I'd do a little write up on the field watch style and its history. I've had a surprising number of people remark along the lines of, "oh, those Alpinist hands.." referencing the Seiko Alpinist (a great watch) as a design influence for the Field Standard. These aren't Alpinist hands, these are Cathedral hands. And they date back quite far.
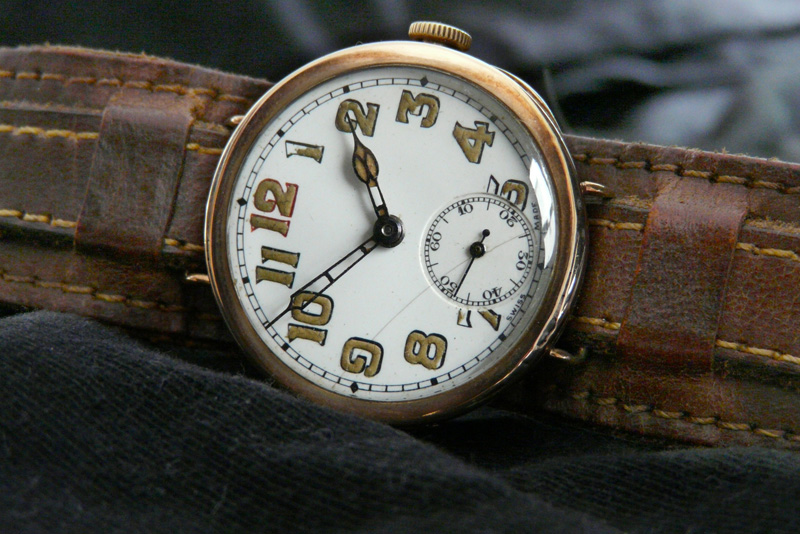
An early field watch. Photo by Nathan Bress
In World War I, watches, by style, were largely pocket watches for males and tiny wristwatches for females. The wristwatch style was seen as "feminine" until the war broke out. The pocket watch became cumbersome, simply relinquishing a hand to operate your watch while in the gnarly trenches was costly and time consuming. Pocket watches soon became retrofitted with straps and thrown on the wrists of soldiers and officers, timing was essential for effective attacks. It was around this time, the wristwatch was seen as a legitimate style for males. Converted pocket watches became more common, as the war raged on more reasonably sized wristwatches were produced for combat.

A 1917 trench watch with a shrapnel guard.
One of the hallmarks of this watch style are the large, legible numerals, the addition of 24hr time being added a bit later. While there were many hand styles at the time, Cathedral hands were one of the innocuous choices for these watches, the large hour hand and slender minutes hand are easy to pick out and provide ample space for the addition of luminous material.
Looking back at Cathedral hands now, they could be described as classical, especially for the field watch style.
The Seiko Alpinist (engraved).
The hands on the Seiko Alpinist (Sarb017) could very easily be categorized as Cathedral hands, though I would make the argument that stylistically they have a bit of Seiko's re-imagination imbued within, a more modern and stylized take on the hand style.
The Field Standard
The Field Standard has a very classically designed version of Cathedral hands, though with modern manufacturing they are able to have much more crisp and defined edges and a sharper overall look. Comparing with the Alpinist, you can see they are actually quite different, the Field Standard's hands actually sharing more in common with the early trench watches, from which the Field Standard draws from (as does the Alpinist).

Cathedral hands have seen themselves on many watches and watch styles over the decades, not just field watches. To me, the Cathedral hand is a hallmark of early field watches and is ultimately why it was chosen for the Field Standard.
Field Standard production has begun!
The funding goal has been reached and the Field Standard is being produced! The target for mid spring is still on!
Stainless Field Standard with black strap
Now some things you may not know; the Field Standard will be an extremely limited batch, 75 stainless cases and 25 DLC black ones which isn't many....
Diamond Like Carbon coated Field Standard
Of course, I have a few really exciting special editions planned, but with a total of around 100 pieces, there wont be many of these in circulation.
I wanted to take this time to thank the backers of this project for helping to make the greatest field watch become a reality. The pre-order pricing will be around until production is complete, but they may sell out before then....
The dive watch is being designed....
The Orion dive watch is being designed
You can expect a fresh new design. No homages. The Orion crown that you love. Sapphire. Ceramic. 200 meter water resistance. Bracelet. Nuclear lume.
Blue Screws
The blued screws of my personal Orion
If you heat steel up the right temperature, you can get some cool colors. I've been on a bit of a bluing kick, that is, heating up screws and wheels and getting them to turn a magnificent color-for no other reason than it looks INCREDIBLE.
There are a few different methods to turning your steel blue, each with their own sets of pros and cons. Being an amateur at this, I've been giving them all a try to see which I prefer and so that I can further understand the process.
The kiln
Here's the kiln at my disposal, initially I perceived this as the best method as you can precisely control the temperature (ha!) and therefore control which shade you want. It does have the added benefit of doing large batches simultaneously.
ETA 6497 with blue screws and purple crown and ratchet wheels
I used the kiln for the ETA 6497 pictured above. Looking closely you can see variation in the colors on the screws and wheels. On the crown wheel you can see a yellow area, this is where a piece of dust landed caused non uniform heat dispersion. One of the reasons there's variation in the colors is that there are currents in the heat flow within the kiln, even over small surfaces.
I tried to remedy this by building little houses out of brass to insulate the parts, but even that wasn't super effective. Time to try some other techniques.
This screw was blued over an alcohol lamp in a small brass jig.
You can get a container and fill it with brass shavings (pretty common) and slowly heat it with your piece inside. The reason I don't really like this method is because you can't directly see your work piece and lifting up the lid and poking around in the brass will disrupt the heat-and that's no good. Right now, for screws, I'm into waving them over an alcohol lamp while in a brass jig.
My space grade screw holding jig with screw secure
And by jig I mean a piece of brass with a small hole in it. I experimented with different thickness of brass and hole placement. If the brass is too thin or the screw holding hole is too close to the edge you'll get non-uniform bluing as heat distribution wont be even. This jig has served me pretty well so far.
You can see how the screw starts out, it's pretty important to polish the screw head before bluing. Having a polished and uniform surfaces will help the oxidation layer (color) take hold at an even rate. Many screws that I pull out of movements are also plated, so polishing that plated surface away is necessary.
Before it turns purple
Steel will go through a different colors before getting to blue (which is the final color and easy to go past). It begins at a pale yellow and darkens to brownish then turns purple/violet before quickly and finally becoming blue.
Blue creeping in
Once you get to purple it's a good time to slow it down and move back from the flame a little. The blue creeps in from the edge then it goes pretty quickly, plus you want the color to be uniform. It's easy to get splotches or different colored edges. It's best to not mess up, the more times you try to get something to blue the more you weaken the metal, and with screws which are meant to be cranked down tight, you don't want to do this process too much to a single screw.

Throw it in some water
Once you get it to the color you want, quench that sucker. The heat within the screw and held in the jig will cause the color to keep changing.
Left is kiln heated on the right each screw is done individually over an alcohol lamp
Many people suggest doing screws in batches so that they're affected by the same amount of heat and come out the same color. This hasn't been my experience at all in my short amount of time bluing screws. Perhaps with a higher end kiln this would ring true, but above you can see the results. The ETA on the left had all the screws done in a single batch in the kiln and the wheels were done in a separate batch. I built smaller houses within the kiln to minimize any draft or current and still the variation is very noticeable.
On the right, the Seiko NH35 has all screws that I blued individually over an alcohol lamp. Each screw is very uniform, at least in comparison to the kiln screws. There's a little variation in the shade of blue, but again, eyeballing the color on each one is still more accurate than trusting the kiln to distribute heat evenly.
Next step is to make some display casebacks to show it all off.
The Tudor is up and running!
The quarter ended, time has literally flown by. I heard about how time passes quickly at watchmaking school from students in the past, but now that I'm experiencing it, I understand.
The hours are long and the work isn't necessarily easy, but it's a lot of fun, every time you put your head down to work on something and look up-hours have passed.
The gear train
Assembly goes relatively quickly, granted everything fits properly and you know where it goes. Slowdowns occur when you discover an issue, create an issue, or go to oiling. Above is the gear train of the watch, each of those pivots on the end rest in tiny holes inside a ruby. When you oil the jewels it's ensuring these interacting parts run with little friction.
Remember in the earlier blog post when I had to burnish a pivot? This is when I get to see if I failed or succeeded. If I did a poor job, it wont fit or run properly and I'd need to order a new wheel.
The gear train bridge
Many components in watches have what is called a bridge. Above is the gear train bridge. The bridges cover and seat your pivoting parts in many cases. When your gear train is installed, you ensure each pivot is properly seated in its jewel, then when you install the bridge you again ensure that the pivots on the other end are seated properly in the bridge jewels.
Failure to align these parts will obviously stop your watch from running, you can also damage or break the pivots/wheels if you tighten down a bridge with misaligned pivots.
Bridge installed
I install the bridge, but something isn't right. The gear train doesn't quite spin freely. Had I not aligned the pivots? I was certain I had. I began to get nervous that maybe my burnishing job earlier had destroyed the pivot of the wheel....
So I did it again...And again. Same thing, the wheels just wouldn't spin right. I solicited the help of a second year student to help troubleshoot the situation. Confounded for a second, he defaulted to "well I guess you bent a pivot..." but the pivots were all fine, we inspected them each multiple times. Then, recalling an earlier exam, he looked at all the jewels, one of the jewels in the bridge wasn't properly seated.
Kris uses his Horia tool to adjust the misaligned jewel
After quickly straightening it out, I was back on my way with assembly. The movement in question is the ETA 2784, which is a pretty old movement which in all analogous models has been replaced by the well known ETA 2824. The 2784 is kind of like the evolutionary ancestor of the 2824, which is what the second year students have been working on (I can just ask them for help!). Armed with an ETA 2824 tech sheet, I was on my way. I soon discovered that an assortment of parts in the 2784 were a bit different than the 2824. The latter, having combined some parts to create more robust pieces and a slightly simpler assembly.
Getting close!
Hand alignment
When aligning the hands it's essential to make sure they're perfectly straight (I use 12:00 as a reference), if they aren't they wont advance properly and will be slightly off, most noticeably when it hits the hour evenly.
Four the hour hand the goal is to get it to align perfectly with the date change, so that as soon as the hand hits midnight, you get that satisfying click over to the next day. For the minute hand, it's important that it's evenly aligned with the hour hand so that they advance properly.
The seconds hand, at least on this movement, you can just throw on there willy nilly.

Setting the hands
Once hand alignment is determined, you press the hands on. For me, this is really enjoyable, perhaps hearkening back to a task I did a lot while modifying Seiko's. When setting the hands you have to make sure they're properly seated on the corresponding pinion or post, perpendicular to the case, and parallel to the other hands. Sometimes this isn't noticeable until you advance the hands. It's good to take your time here and make sure the hands are done properly; nothing is more deflating than getting your watch cased up and on your wrist to see the hands catch on each other.
Getting there!
That's more like it!
The next step is refinishing the case. I need a couple parts like new (proper) gaskets, a new crown tube, and crystal. After becoming proficient at refinishing cases, I'll give it a shot on the Tudor, at that time I'll replace the case parts that need replacing. As for now, it's been keeping amazing time!
Reassembly of the Tudor (ruby edition)
Tudor 'ETA 2784' main plate
Reassembly of the Tudor begins!
It has been sitting under a dust cover in the form of a bunch of tiny, but clean parts. I began to miss wearing it more than I thought I would. Free time is at a premium with my current schedule, and during school hours the course projects take priority (duh). That's why I finished the current ones up, so I could get back to this.
A couple tiny rubies.
Servicing a watch isn't just about taking it apart, cleaning it, and putting it back together. Parts wear out and need replacing (if you recall from earlier blog posts, burnishing a pivot and replacing the mainspring), cleaned jewels, pivots and moving surfaces need to be oiled and greased. Applying oil is a bit of an art, and a skill developed through a bit of repetition. Too much oil and in the wrong spots can cause your watch to run improperly or just straight up damage it.
Most of the pivots in a mechanical watch interact with a tiny ruby. When oiled properly the action between the pivot and ruby has very low friction and runs efficiently. Servicing your watch is partially about cleaning and oiling these pivots because over time the oil will degrade and get dirty. When this happens it becomes harder for your watch to run and the degraded oil and dirt will wear down your watch, best to keep them freshly cleaned and oiled on a regular interval-not after you've detected a problem.
A cap jewel next to a penny
I've spent a bit of time practicing oiling, especially on cap jewels, which I find particularly challenging. The battle with cap jewels isn't just applying the oil, but it's how you handle and manipulate them. If someone walks past you too briskly, it may fly away. If you grip them too tightly with your tweezers, it'll fly away. If you breath on it, it'll definitely fly away. Basically, you need to refine your micro-telekinesis skills, hold your breath, and hope that you can apply the oil before you need to take a breath (or somebody walks near you). And when I say fly away, I mean take off like the golden snitch, you literally need to be a wizard to find it.
That's way too much oil
When oiling a cap jewel you need to apply the right amount pretty much on the first try-some situations may offer some forgiveness but that's uncommon. Above, you'll see my oiler with a tiny drop of oil on the tip. That is an example of way too much oil (for this specific jewel).
That's a better amount
The oiler comes to a needle like tip (literally) and there are a few techniques to determine how much oil you pull and let go of. Each jewel necessitates a different amount of oil, there's no good way to know how much is the right amount other than doing it a whole bunch of times with the trusty 'trial and error' methodology.
Oiled cap jewel
Here you see an oiled cap jewel, well it might be hard to see the oil, it's kinda tough to photograph. The goal is to get a nice blob that occupies around 50% (give or take some depending) of the surface of the jewel. It needs to be a nice uniform circle. The cap jewel actually rests on top of another jewel that the pivot of the balance wheel interacts with (cap jewel because it gets worn like a cap..?). You need to drop this jewel EXACTLY ON TOP OF THE CAP JEWEL and the capillary action of the oil secures them together. When dropping them you have to do it right so the oil doesn't mush out everywhere, which is my bane right now. You just do it enough times until A) you actually get it perfectly, or B) you become a god tier watchmaker that can one shot oiling every jewel on every watch (goals).

Helpful diagram of what's going on
Installed
Since I'm still a novice when it comes to perfect oil application I decided to do the cap jewel oiling first in terms of reassembly. I knew it would take a bit of my time (I lost count of how many attempts it took), but I was able to make some good headway with reassembly.
Missing some jewels
There are shock absorbing jewel settings on the dial side of the main plate and in the balance assembly. Above you see a balance cock sitting on a balance tack with the balance wheel hanging by the hair spring.
For the sake of brevity (it's actually just past my bedtime) I'll save more of the reassembly for a later blog post; and in additional news, my latest model (and shameless plug) the Orion: Field Standard is available for pre-order. So at least check it out and tell a friend, it helps me pay the bills.
Until next time!
♥
The Tudor Oysterdate
The watch in question
A few days ago I went to stick a new strap on my watch, a vintage Tudor Oysterdate from the 70's when I noticed it wasn't keeping time... It actually wasn't making it beyond a few ticks. I tried everything I could, but at home my only tool is a springbar tool, so it would have to wait....
I bought this watch because it was a good deal and I loved the style and fluted bezel. I have really tiny wrists so the 34mm case size fits them perfectly, I just can't comfortably wear a lot of modern watches.
On the bench
I got it to school and began getting input from other classmates on potential diagnoses, we suspected the gear train or the mainspring. The mainspring is a long and tough metal spring that gets coiled into a small drum, when wound it contains considerable force and is also the source of energy for mechanical watches.
I got it to my professor to hear our potential thoughts and get his hypothesis. He masterfully checked out a few areas and "probably a broken mainspring."
He handed it back to me. He also cautioned against being hasty in taking apart watches with value before having more training, giving me anecdotes of students past who caused considerable damage to some of their rare and valuable watches. I think he saw that look in my eye and knew that I wouldn't be deterred.
Later, I solicited some guidance from a second year student, the second years have been working on the ETA 2824 movement, a very widespread and, to some degree, standardized movement. The Tudor that I was taking apart runs on the ETA 2784, which is a very similar predecessor to the 2824 (I already just say random numbers when referring to movements in hopes that someone will understand, these are going to be annoying to memorize). So at the very least, it would be good practice. Real world wear and tear on a watch movement is quite different than simulated wear and it varies wildly from watch to watch; this is where the problem solving skills of the watchmaker come into play.
Even the case was a challenge that got a few of us rubbing our heads together. These older cases depend on the bezel to create pressure to secure the crystal. Eventually with some fine razor blade skills and some gentle bezel removing action from the slightly scary Rolex bezel remover, it was all taken apart. A film of glue or gunk or both had made this tight fitting bezel even tighter on the case.
The gear train and pallet fork
Pulling apart the movement it was pretty clear that it was in desperate need of a service. The oil was dry and and formed gunk all around the jewels and gears/pivots. I got to the mainspring barrel, opened it and discovered my professor was correct, the mainspring had indeed snapped. I let him know that he was right, he then sent me on the guided path of a thorough and full service of the watch. I got it all disassembled and began a preliminary cleaning (before it goes into the ultrasonic) he then instructed me to inspect each pivot of the gear train, instead of helping me get the watch back on my wrist as quickly as possible he was going to help me learn as much as I could, especially about how vintage watches wear.
The photo above is the gear train all aligned and stuck in a piece of Rodico, which is a sticky tack like material with a plethora of uses. Aligning the pivots like this lets you easily view them under the microscope without having to fuss over each one, saves a lot of time. These are very small components, and even mishandling them can quickly destroy them.
The pivot of the 4th wheel, after burnishing
Above is a photo of a pivot. These are really tiny (this one is 0.11mm in diameter) and fit inside of tiny rubies with holes cut out so they can spin with low friction and wear. These points of interaction need to be kept properly lubricated or else you can damage or accelerate wear within your watch. This is why you hear people talking about regular service intervals for mechanical watches.
The pivots were mostly okay, the 4th wheel had some wear, which presented itself as a black line under the 50X microscope. When the pivots wear down it affects the timekeeping of your watch, if it gets bad enough they need to be replaced, but before they get too bad you can do something called pivot burnishing. Using a burnisher you set up your wheel and pivot on a special lathe, the burnisher doesn't really cut material but mashes into a uniform plane; if you do it right.
Like I mentioned earlier the pivot has a diameter of 0.11mm, it needs to be this size to function. To burnish it, the cup the pivot gets placed in has a diameter of 0.10mm, so a little tiny bit of the pivot sticks up. You then spin the lathe with a handheld bow and simultaneously push the burnisher to-and-fro to polish the pivot.

Getting a lesson on how to burnish pivots. Photo by: A. Diaz
I got a quick lesson and demonstration from my professor on how to burnish pivots. Once the pivot is installed on the lathe (almost the entirety of the operation) you're ready to go, but the burnisher and jig obscure your vision of the wheel 100% so this is completely based on feeling. I'm familiar with feeling certain aspects of watchmaking, like applying hands. At first hand application was very challenging, then you began to understand how much pressure to apply and wear to apply it, it's less about seeing it, than it is about feeling it. That was tough to learn, and this was going to be even harder. If I burnished this to 0.10mm from the 0.11mm it would be useless and I'd need to buy a new one.
Getting the 4th wheel pivots properly seated. Photo by: A. Diaz
My professor, Dave, made 2 passes with the burnisher during his demonstration, now it was my turn. I took the wheel after his couple passes to the microscope and we checked it together, it needed a little more work. It was now my turn. I painstakingly got it mounted, made sure it was ready to go and gave it a spin. Burnishing is a bit like patting your head and rubbing your belly. The bow goes down, the burnisher goes out, bow comes up, burnisher comes in BUT DON'T FORGET TO FEEL THAT PIVOT. I got the burnisher locked on the pivot and Dave quickly pointed out it wasn't flat, oops! Flattened it and got the bow spinning the lathe "MOVE THE BURNISHER!" Ok, well Dave didn't yell at me, he never yells, but I was patting my head and not rubbing my belly. I got the burnisher going in sync with the bow, felt the contact with the pivot, such a subtle light feel you aren't sure if you're imagining it. And after 3 passes I decided it was time to check it.
Trying to relax in a tense situation! A small crowd had gathered to see what the hubbub was about, didn't help the nerves!
Photo by: A. Diaz
The pivot had been burnished! It wasn't a super perfect job (photo is the one with the red arrow up the screen) but it was better than what it was before, and I didn't destroy it. So I'll chalk that up to a success.
The watch parts have all gone through the ultrasonic, next step is reassembly and oiling as well as one I'm really excited for, case refinishing.
To be continued....
Time is flying
Another week passes almost instantaneously
The hours, as I mention, are pretty long but it doesn't seem that way at all. I blink and Monday turns into Wednesday then before I know it, it's the weekend.
Since the last blog post we've gotten to dig into some new stuff, like movements, specifically the ETA/Unitas 6497 as pictured below.
My partially reassembled (or is it disassembled) 6497
We disassembled and reassembled our movements a handful of times. Going over new procedures on each pass and eventually getting to oiling the jewels-which was pretty darn challenging.
This was the first time a lot of us got to actually dig into a mechanical movement, for me it was a welcome break from the hours of filing, but for others, as parts got damaged or flew away, I noticed the frustration building. With watchmaking, a huge portion of the challenge is simply knowing how to handle and manipulate the parts. You can't tell someone how much pressure to apply while holding a screw that's 1mm in diameter, you have to experience it to know. And the first few times, it's not unusual to launch the tiny part into oblivion only to never have it return.
Back at home in the tiny workshop in my room I usually got to operate in private, meaning nobody witnessed the continuous catharses of my watch rage. Even though there was some heartache and lots of searching for parts on the speckled vinyl floors, I think it's safe to say that everyone was relieved to get some hands on time with a watch movement (I'm also like 99% sure I'm making my class more insane with my horrible puns, but my soul is fueled by puns and coffee, so they'll have to deal..).
The pallet fork
Above is the pallet fork, on the opposing end of the pallet you can see the pallet jewels which are tiny synthetic rubies that strike the escape wheel (which translate to the tick of your seconds hand). Oiling the pallet jewels was probably one of the more challenging maneuvers to date, and this is a pretty big movement. It includes navigating an oiler primed with JUST THE RIGHT AMOUNT of oil onto the correct surface of the pallet jewel then having the escape wheel/pallet jewel advance so that the oil is distributed properly. Right now, in my mind, proper A+ oiling is far more challenging than simple assembly.
Timing the movement
After multiple run through's with my movement I had a little spare time, so I thought I'd try my hand at regulating my movement. Timing a movement is a bit more comprehensive than the average person may suspect, and in my opinion those timing apps that people are always sharing on forums and social media are dangerous tools that may make watch owners more neurotic. Timing includes checking things like amplitude, rate, and beat error; these are things that are pretty impossible to get an accurate read on without a timegrapher. In addition, you time the watch in multiple positions, gravity alters the power and consistency of your watch, and since your wrist isn't a stationary object it makes sense to time in all these positions.
Most folks may notice that their watch keeps a X amount of time using one of these apps or based on their observations, but a timegrapher may reveal that in certain positions your watch keeps a very different rate of time. The goal of regulating is to minimize the variation in all these positions so that the average rate is something acceptable.
I was able to regulate the 6497 to some wonderful specs in the dial down position, and averaged out the rate looked very good, but the "delta", the range between your positional rates, was still a little big. So even if you show someone your watch that "gains 1 second a day" or whatever, it could still have a large delta, meaning some positions it gains 20 seconds a day, but it just averages out to something else. At any rate, I probably need more experience here before I can explain it more concisely, so stay tuned for my updated attempt at sleepy horology explanations!
My bench neighbor's bench, he's also named Nick.
I also like looking at everyone's benches, each layout is unique, representing how the person approaches watchmaking, but the tools we have are largely the same.
Watchmaking school!
We've been working a lot on our filing technique.
For the first month we've been learning techniques that will transfer to smaller parts, we've learned about materials, and we've dabbled with some of the tools. Well, maybe that's an understatement, we've been pretty busy. Long days all kind of blend into each other.

Max, a second year student, visits our side of the class to turn his handmade etachron tool on a lathe.
So far, there has been a big emphasis on understanding and achieving small tolerances, getting rid of burrs, and, well, filing. Tomorrow, though, we get turned loose on our first watch movement.

Above is an example of a filing exercise. This is a bench block. We start with brass stock and are given a blueprint. Armed with our files, drillbits (and a drill press), and a sharpening stone we craft our bench blocks with a tolerance of 0.1mm (which, in the watch world is still a large number).
This one called for a grain finish (achieved by use of the sharpening stone) which are those lines you see; it also called for curved ends which was kind of the crux of the assignment, since they had to be done with our file by hand. After you've gotten your shape, everything square and flat you've got to throw a 45º bevel on the edges and chamfer your holes finish and clean it, then hope you don't get any kind of scratch or oil from your fingers on the surface-because that'll cause it to oxidize/tarnish and you lose points for that.

Alum and water!
The smallest hole on the bench block is 0.5mm which is drilled with a pretty small drill bit (duh), you may be able to deduce that this is a very delicate hole to drill. A handful of classmates experienced this tiny bit breaking off into their bench block. This is where alum and some water heated over an alcohol lamp comes in. The reaction between the alum water and the iron based drill bit will dissolve the bit but leave the brass bench block (say that 5 times fast) unharmed.
The alum and water trick is one many of us will use down the road when trying to remove broken screws/stems/whatever from watch components. And it leads to this point, we're given these tasks with not always the most optimal tools, but the tools we are given are the tools that will prepare us for watches.
Orion: Field Standard
The prototype Field Standard
I rushed back to my small house, the tracking had shown the package had arrived. I ran to the mailbox and grabbed the small parcel that contained new dials and hands. I jumped back into my car and headed back to school. Class was now over but I all my tools were at my school bench-I don't really have the space to setup for watchmaking at my new house, plus I am able to use the school's equipment and space once class is finished.
I opened the package as quickly as I could, and laid out the parts on my bench, I couldn't help but smile as the wave cut indices and mountain cut hands glistened back at me. A couple people watched as I began the process of putting them all together.

Field Standard assembly. Photo: A. Diaz
Working with watch parts is something you should never rush-in this line of work the saying "haste makes waste" is pretty much on the mark; but I'll be honest, I assembled the prototype as quickly as I could. The results were better than I could have hoped for, it's been a lot of work moving here and starting school, though the rewarding bits are starting to add up and this was definitely one of them.
The Field Standard is a field watch, that much should be obvious. I thought I'd dress up the almost repetitively subdued watch style. The slightly angled and highly polished hour and minute hand work with the polished and wave cut indices as well as the polished bezel. The white seconds hand ties in perfectly with the white text on the dial and the white stitching of the black strap. Then there's the C3 lume on all the numerals and the hands, this thing glows.
I also Field Standard-ized my personal engraved case.
I'm really excited to work towards production of the Field Standard, I have a really cool engraved pattern idea for it as well as potential media blasted limited editions. Also, for the Orion: 1, you should keep your eyes peeled and your clicker fingers ready, because there's going to be a limited edition black cerakote run dropping soon.
A tiring transition.
It has been a long two weeks.

I feel a bit like this chimp at Goodwill.
The halogen lamps glow above me and the dryer whirs in the background. I have finished my first week of watchmaking school and have finally moved into my shared house. I've hardly had any free moments and exhausted doesn't really do whatever state I'm in justice.
Watchmaking school isn't the stressful part; despite the long hours and the repetition of filing for almost 10 hours a day, it's a lot of fun. The people are all different and interesting, yet we're all bound by a similar and rare thread. There's an anxious giddiness about all the first year students, and it's a refreshing new atmosphere for all of us-I wouldn't want to be anywhere else.
It's everything that's outside of class that's stressful. Moving is stressful, it's expensive, and damn, those car dealerships are like purgatory. There aren't enough hours in the day to accomplish what I need to accomplish-and that's running on little sleep.
I'm more than thrilled to be living the dream, though I suppose this period will serve as the humble beginning.

Alena, a classmate snapped this shot of me putting in my 1,543th hour filing the first project. She also sells cool enamel pins worth checking out. <--click
Oh yeah, seeing you all post shots of your Orion's on Instagram totally makes my day. Almost all of the orders have been sent out, your support means the world to me.
Pre-Orders Are Shipping!
The time has finally come! Watches are complete and pre-orders are being shipped. It's certainly a very busy time for me as I transition from Philadelphia to Seattle and prepare to begin watchmaking school. Nonetheless, it is also a very exciting time and I'm thrilled to have the opportunity to pursue and fulfill my passion, which of course, would not be possible without support from all of you.
An Orion Update
The Orion 1 with a custom strap from Fabnik
Orion production is still underway (the serial numbers were lasered just the other day!) and I am hoping that they will be complete by the end of the month. I wanted to take this moment to share some photos of the box and integrated strap (which I think looks great) that they'll be coming with.
The integrated strap fills up the space between the lugs for a seamless fit.

Worn & Wound Reviews the Orion

Photo by Zach Weiss
I sent one of the Orion prototypes to Zach at Worn & Wound. He took some amazing photos and wrote about his thoughts, click here to read about it!
The Traveling Watch visits Average Bros
The Traveling Watch visited Mark of Average Bros; check out his review!
Prototypes arrived and assembled!
The red dial variant of the Orion: 1
Prototypes have arrived and I finished assembling them today! Overall I'm very pleased with them, but a few tweaks are in order-such as adjusting the lug hole position (so straps fit better) and getting brighter lume. Everything is very high quality and feels/looks great in person. The crown screw down action is exceptionally smooth and fun to operate. I'm looking into having bracelets (oyster style) produced, in the meantime, strap suggestions are welcome!
Some specs:
- 100m WR
- Domed sapphire crystal w/ blue AR
- NH35 Movement
- 20mm lug width
- 40mm case diameter
- 49mm lug to lug
- Drilled lugs
- Screw down crown
Blue dial variant, every 5 minutes there is a blue minute marker. Strap is a placeholder.
There are two dial variants, the red and the blue. On the red dial the WR text is red and all minute markers are white, while on the blue dial there is a blue tick mark every 5 minutes. Each variant has a different tone and look, whether you want something a bit more serious or lighthearted.
Once prototypes are resolved a pre-order will be going up, stay tuned and be sure to comment with your feelings and share with your friends, it means a lot to me to spread the word and the success of this project is contingent upon it!
The Traveling Watch visits Timepiece Chronicle!

Photo by Ben Newport-Foster
Be sure to head over to the Timepiece Chronicle, the latest destination for the Traveling Watch. The Timepiece Chronicle is a cool site dedicated to finding and reviewing cool brands. Ben, the founder, has had the Traveling Watch for the past little bit and has written a wonderful and extensive review on the piece, complete with some nice macro photos. Click the bold text above to see what he has to say!
Orion prototype teasers!

The red variant.
The Orion prototypes are complete and looking good! Of course, I'll know more once they're in my hands, but right now these teaser photos will have to do!
Some info about the watch: It'll be around 40mm and have 20mm lug width. It features an AR coated domed sapphire, drilled lugs, screw down crown and 100m WR. The lume is also the white-in-light but icy-blue-in-the-dark BGW9 which is second in total lume brightness to the green C3. It's powered by the venerable automatic (and handwinding, GOTTA wind that crown!) Seiko NH35. It's also cased in 316L steel. As you can see, it's pretty dressy but from the specs it's also gonna be pretty tough. It's the kind of watch that you may wear to a wedding where the chance of getting thrown into the pool is high.
At any rate, once the prototypes arrived and receive the OK I'll begin a pre-order, which for simplicity's sake, will most likely be through this website as opposed to Kickstarter. The first run will be pretty limited, I'll also be sure to do some extra limited runs of engraved editions.
I'm really excited to see this begin to come to fruition-and to all the people who've helped me along the way (you know who you are) whether it was sobering talks, design help, or taking me out for a beer so I could vent-thank you so much!
Now for some more pictures!

Caseback with simple holes-so it's extra easy to remove (not that you should).
ORION PROTOTYPES ARE INBOUND!
The Orion watch prototypes are on the way! Things to expect are 100m WR, 40mm case size, drilled lugs and an alternation polished and brushed finish. This watch will be dressy enough to wear for special occasions, but tough enough to wear everyday. Oh yeah, and doesn't that crown look fun to turn? Will definitely be automatic and hacking, it'll also have a movement that should open up some customization for modders!
Stay tuned for the pre-sale!
Traveling Watch in Chicago!
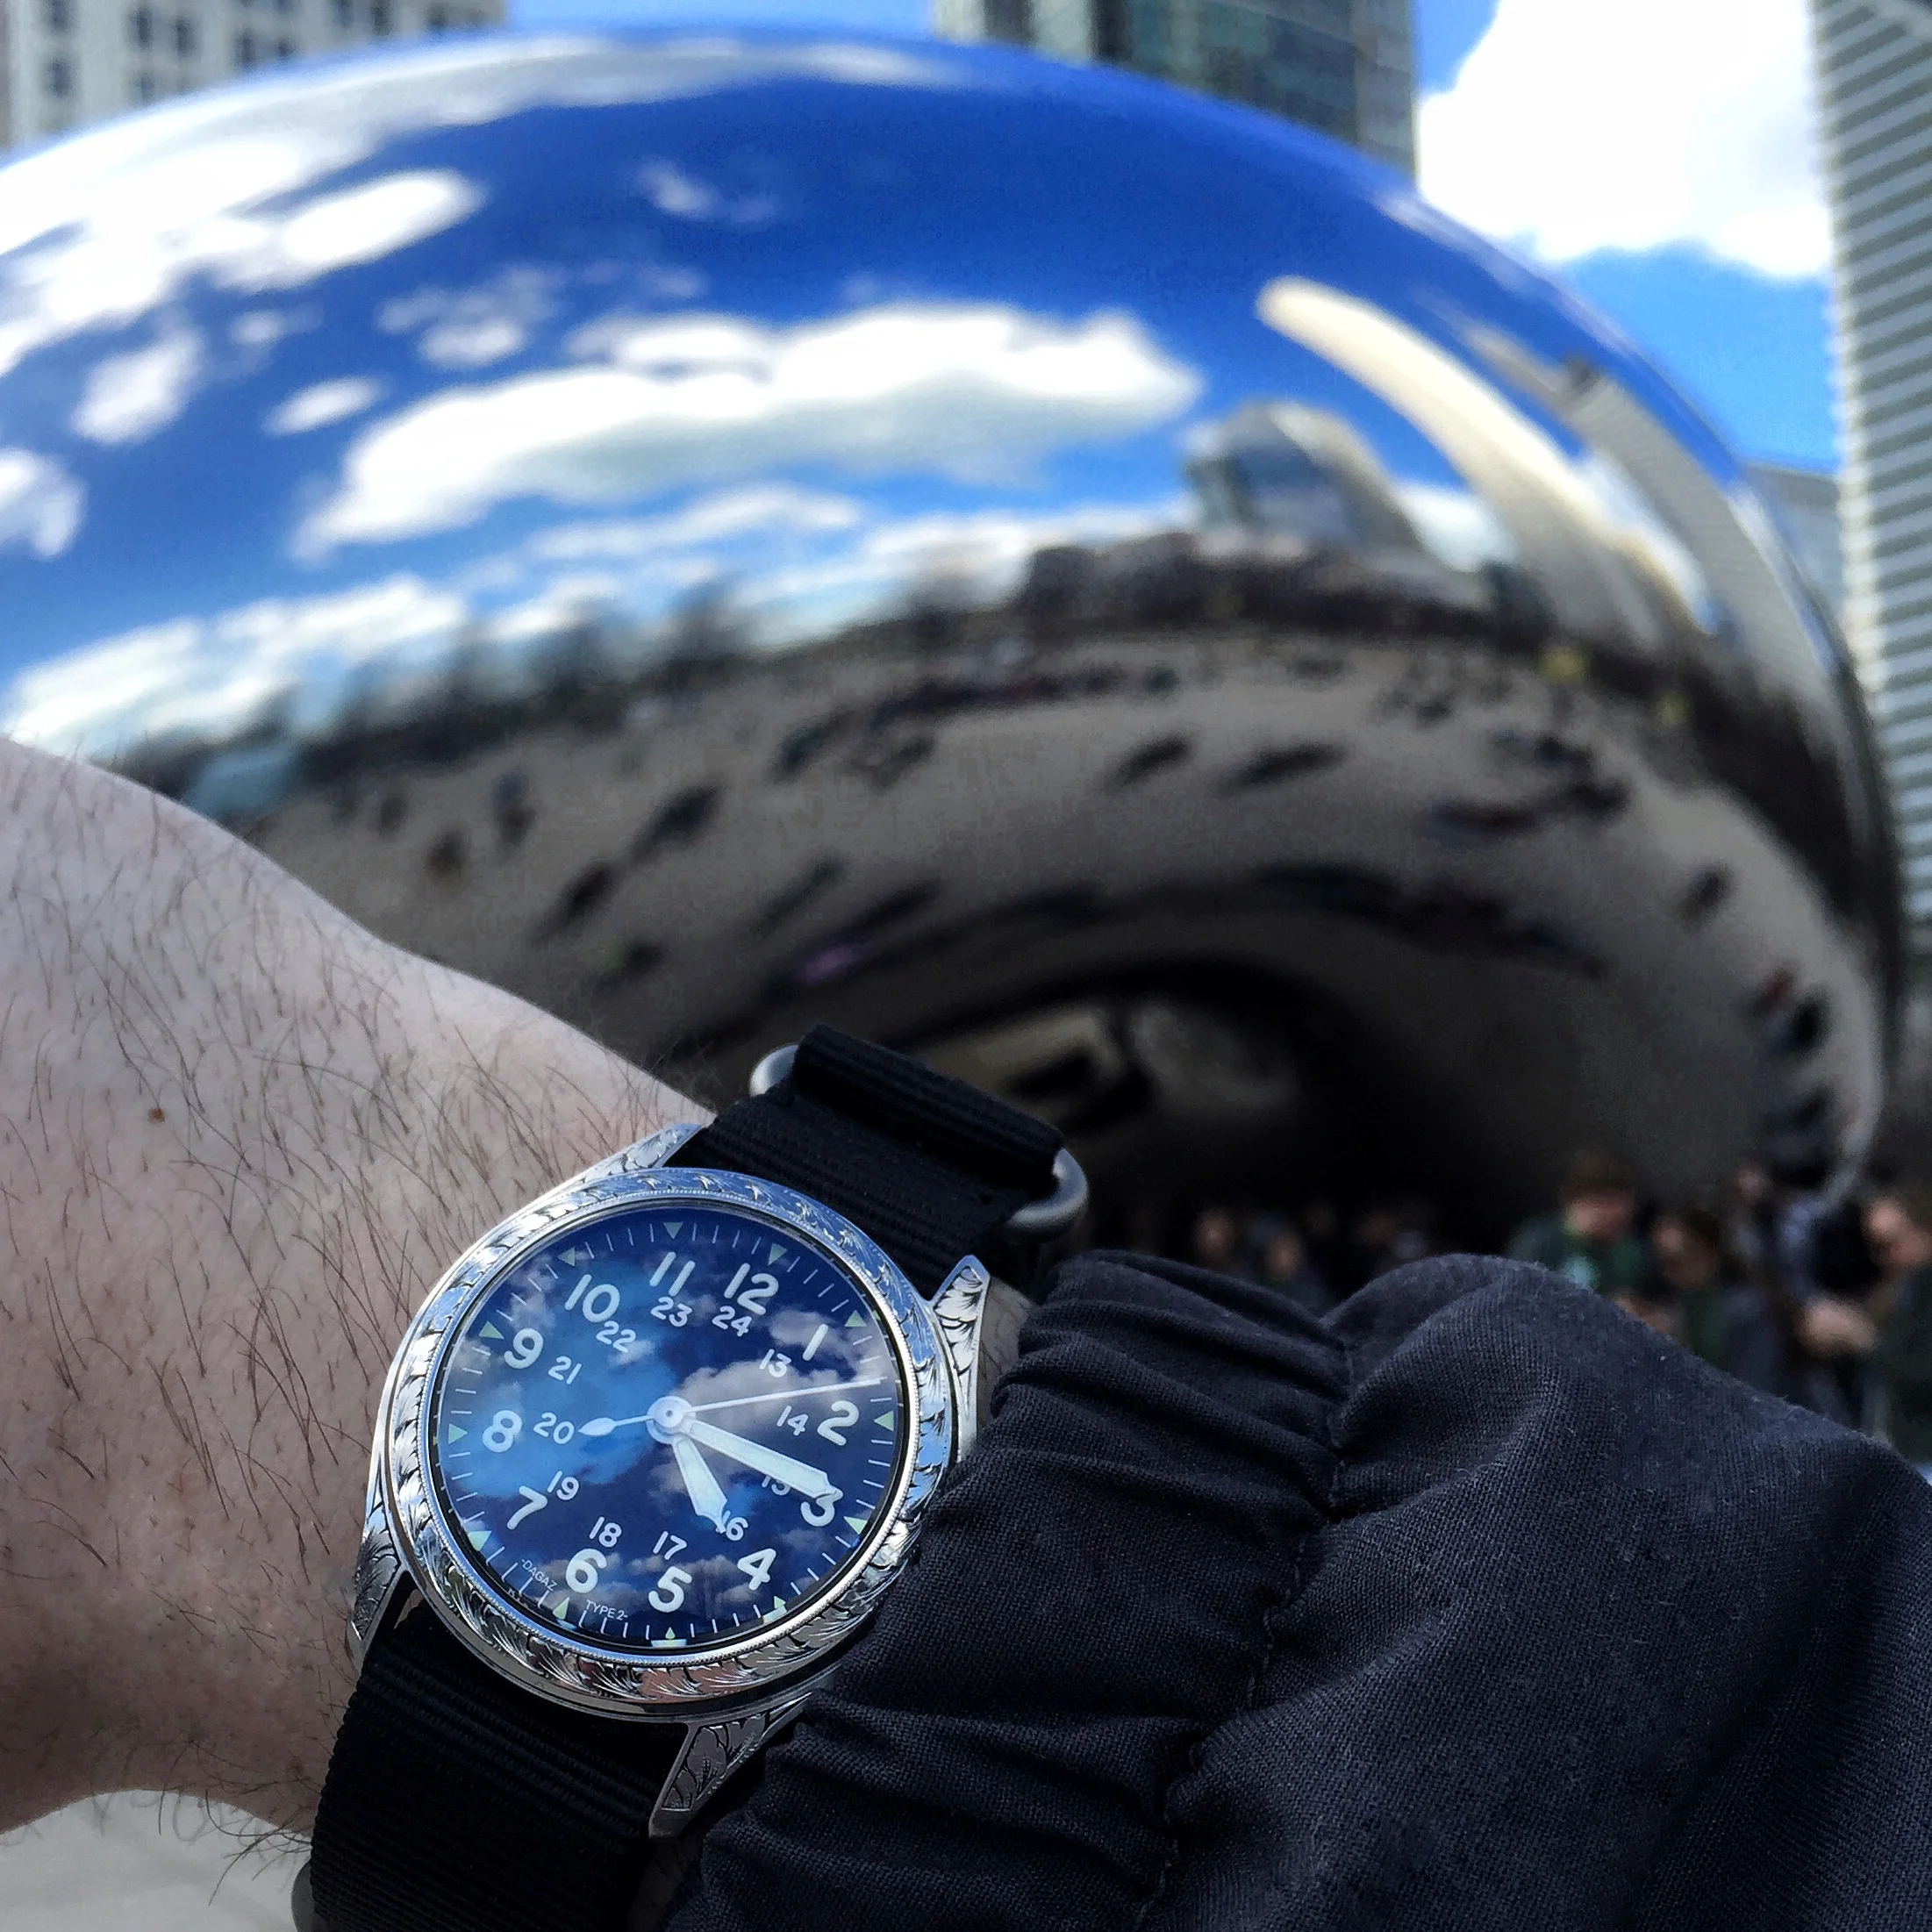
The Traveling Watch visited GWJonesCreative in the windy city!